Journey quick guide
Journeys
25/7/2024 14:32
Introduction
Journeys is a CRM tool designed to automate your campaigns. Here, you'll have the capability to construct journeys composed of multiple journey steps. A journey step serves as a trigger to dispatch content to your contacts. It can be created with various rules, and the content will be sent only if the contacts meet all the specified criteria. Journey rules may include scoring, but let's discuss all components of journeys in each section below.
Journeys
The journey itself serves as a centralized space where a group of journey steps is gathered together. You can construct your journey within the journey section. However, it's important to note that the journey functionality does not support multiple branching. Ensure that your journey has a single branch. Let's explore the journey section:
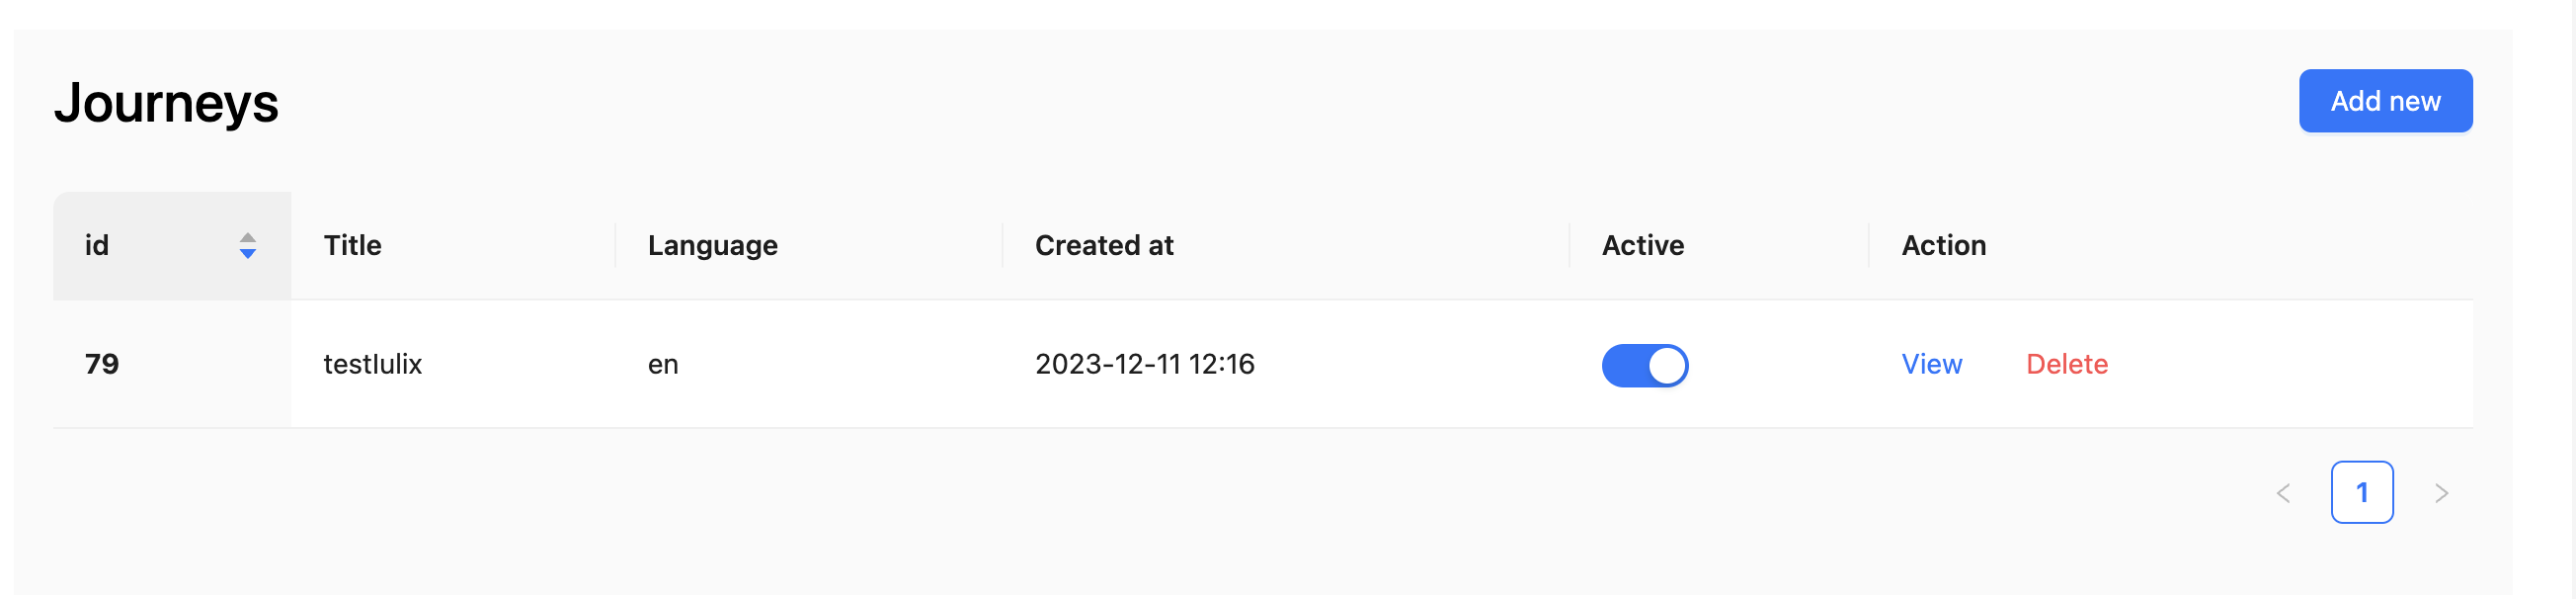
When adding a new journey, it automatically generates the first step, necessitating only your edits. Also, to temporarily disable a journey workflow, simply toggle the switch in the journey list, deactivating the journey.
Journey Step
Usually, a journey consists of numerous journey steps, serving as its fundamental building blocks. This section houses all the critical details: choosing the composition to send, specifying the channel for delivery, and defining the necessary criteria to be met. The primary settings are prominently displayed in the top part of the User Interface. Let's explore these settings before diving into each specific field.
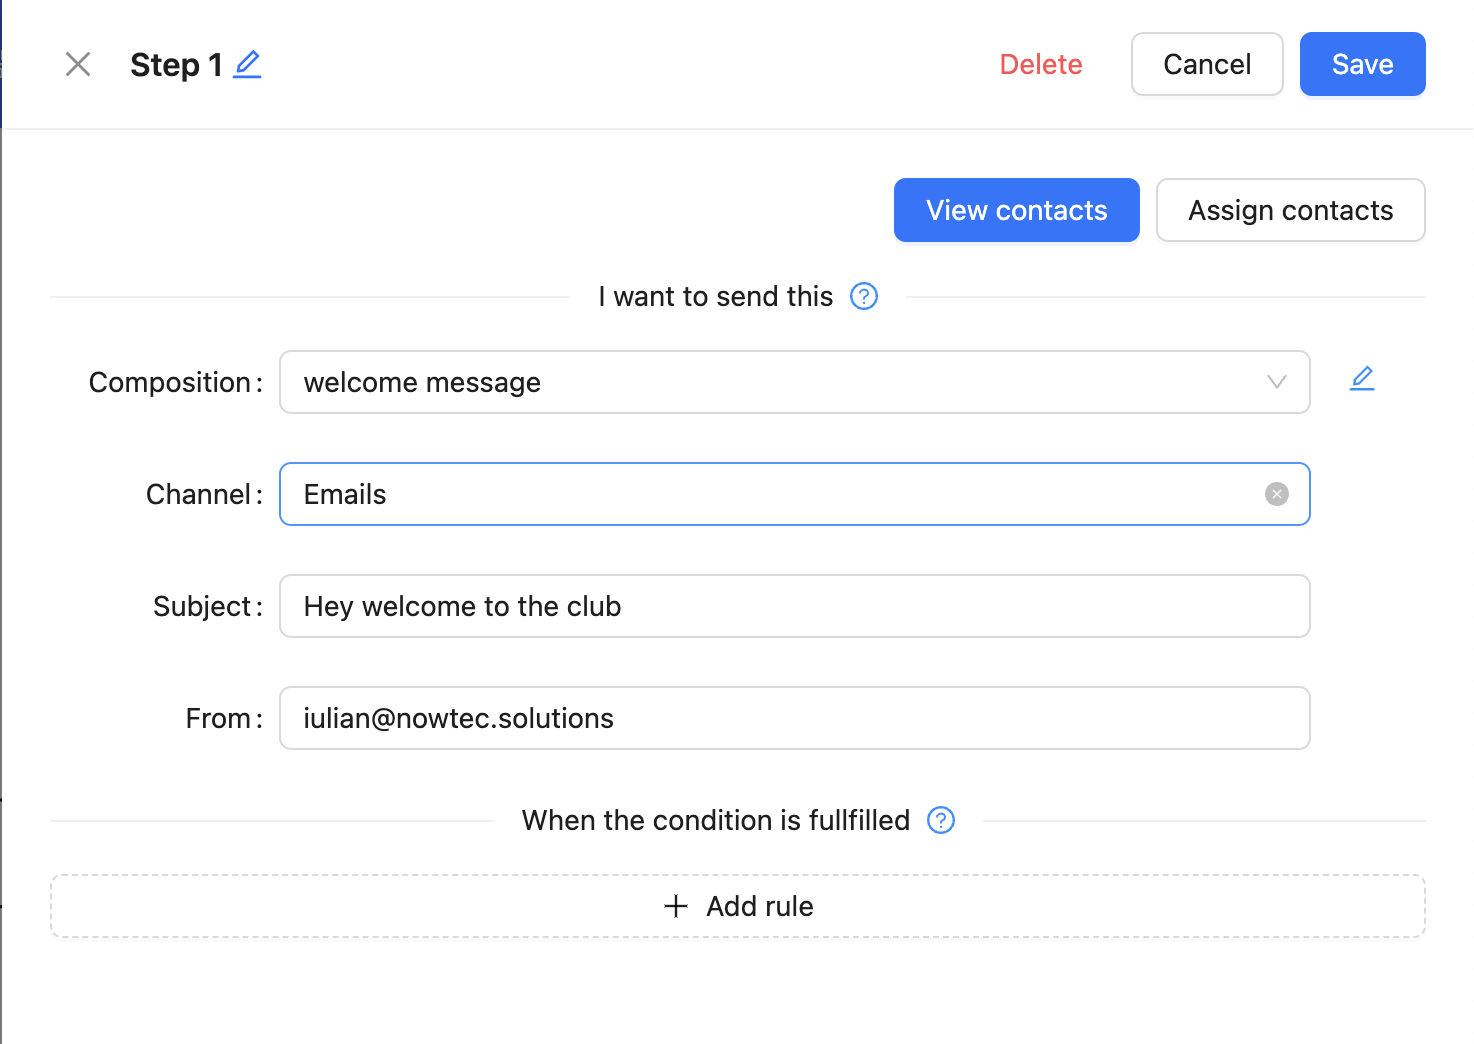
In the top part (header) of the user interface is located the basic actions of the steps like delete, cancel, save and in the left is displayed the title of the step, you can rename it using the blue pencil icon.
Below, you'll find the contact action buttons labelled View contacts and Assign contacts. These buttons empower you to allocate contacts to specific steps. This feature enables you to assign a contact directly to any step in the journey, allowing flexibility in the journey's progression. Let's explore this functionality in the user interface.
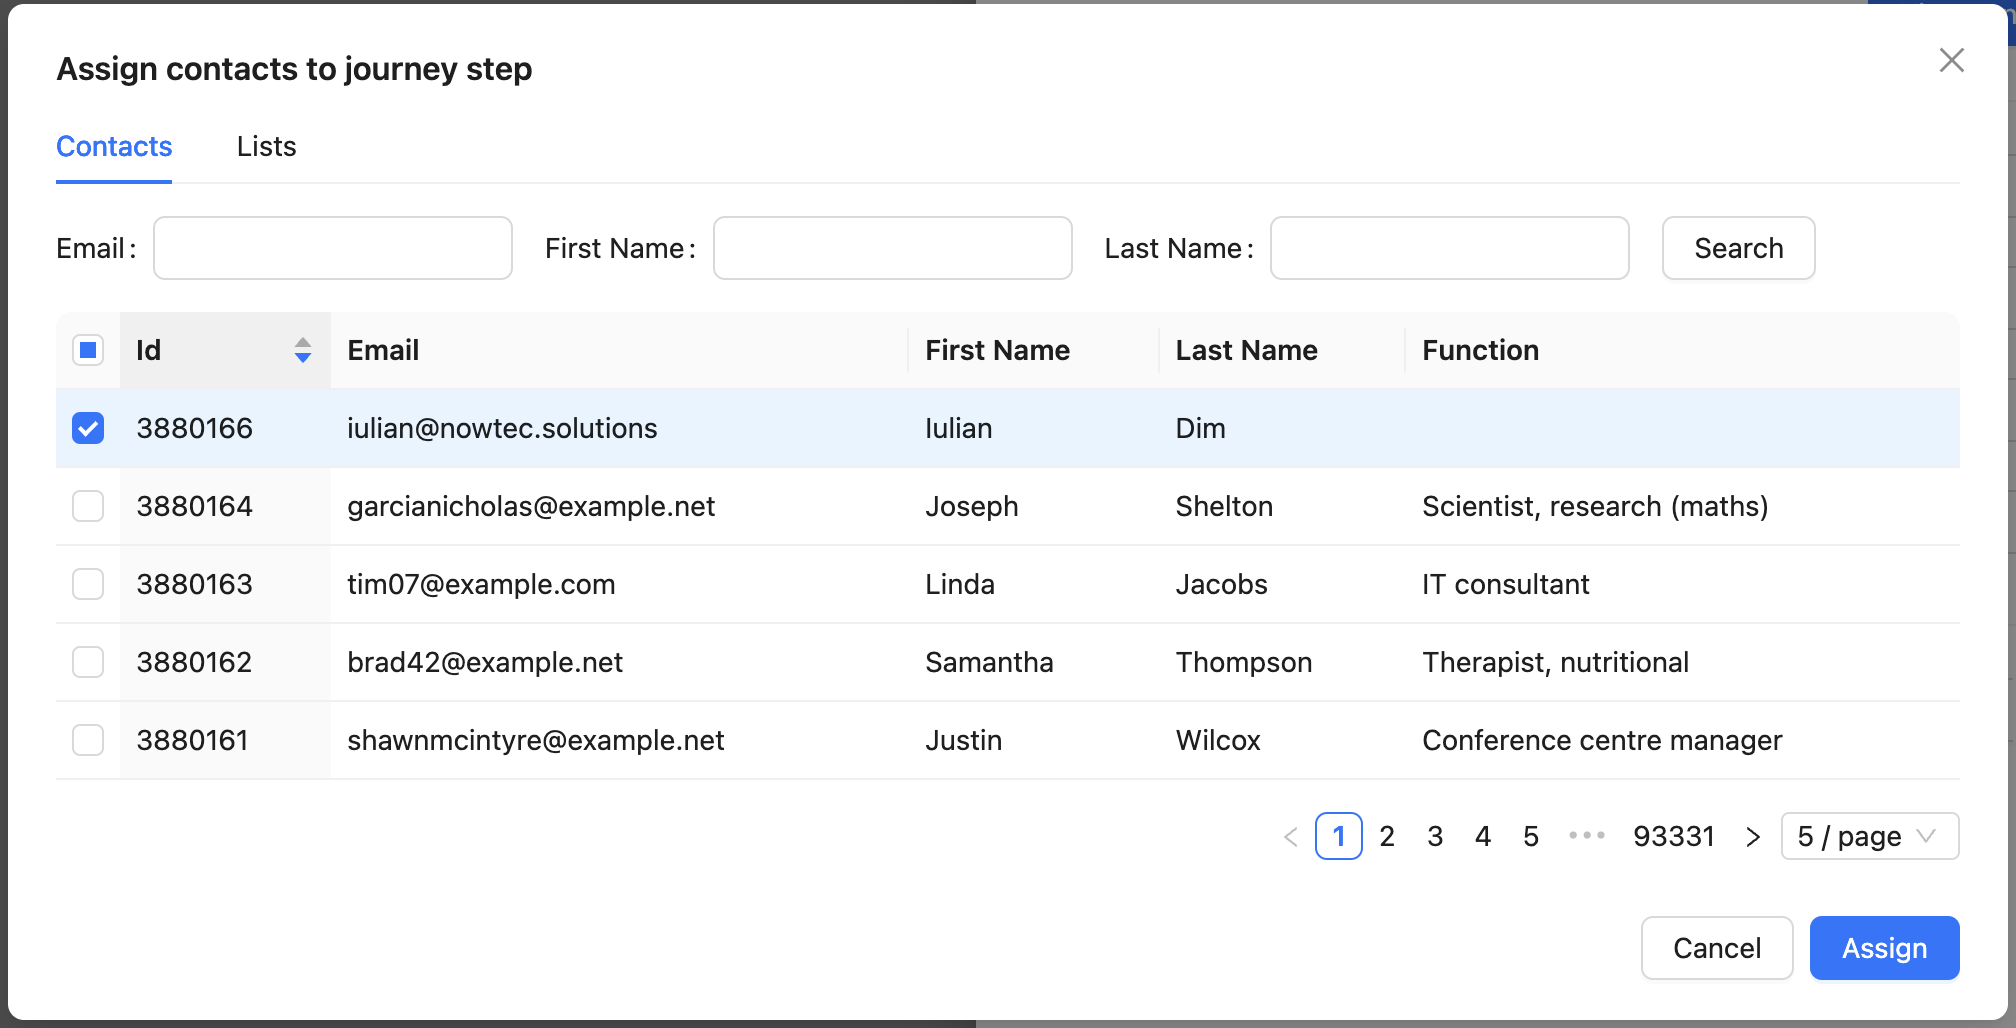
You'll notice a list displaying all your CRM contacts. Simply choose the required contact from the table list, or utilize the import functionality to select a specific list of contacts.
Now we can see the selected contacts using our View contacts button:
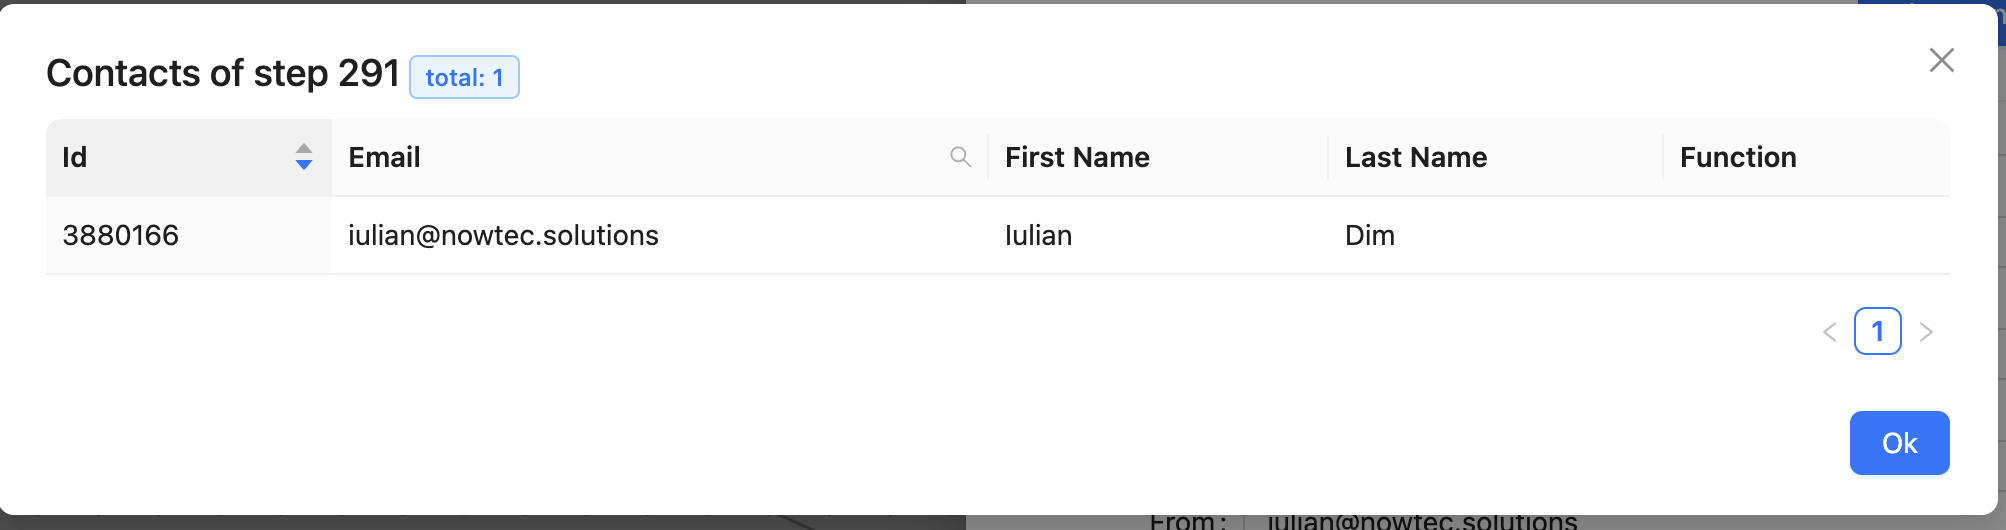
In the header near the title you will see the total contacts assigned to this step (blue label)
Alright, now that we've attached the contacts to our step, let's define the data we want to send to them. Typically, you'll find four fields below: Composition, Channel, Subject, and From. The first two are primary fields, while the others are additional. By default, the Email channel is selected, requiring extra information such as the email's title and the user who will send it (which defaults to your current CRM user).
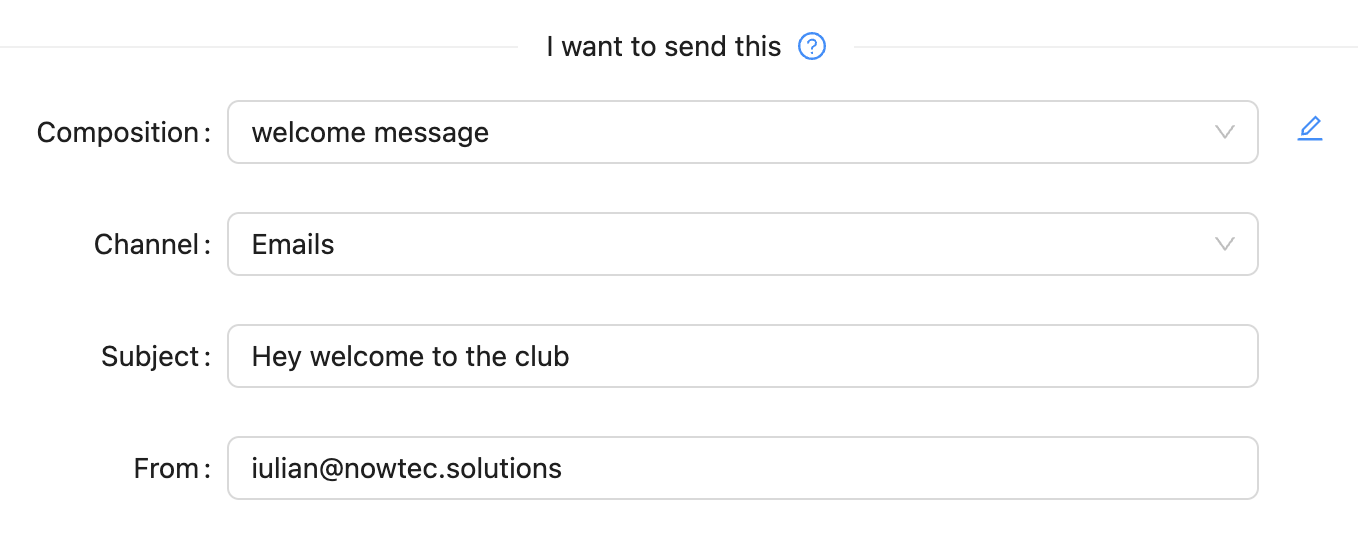
If we'll select the SMS channel for example it doesn't require any additional information because we don't need any title like in email channel and we also know their phone numbers. But be sure if the phone number is not set in contact data, that contact might be also ignored.
Remember, when a contact successfully passes through a step, they will be automatically assigned to the next step if they meet the necessary criteria or rules.
Journey rules
Journey rules are integral to each journey step, allowing multiple rules to be associated with a single step. Before delving into each item, let's explore the user interface.
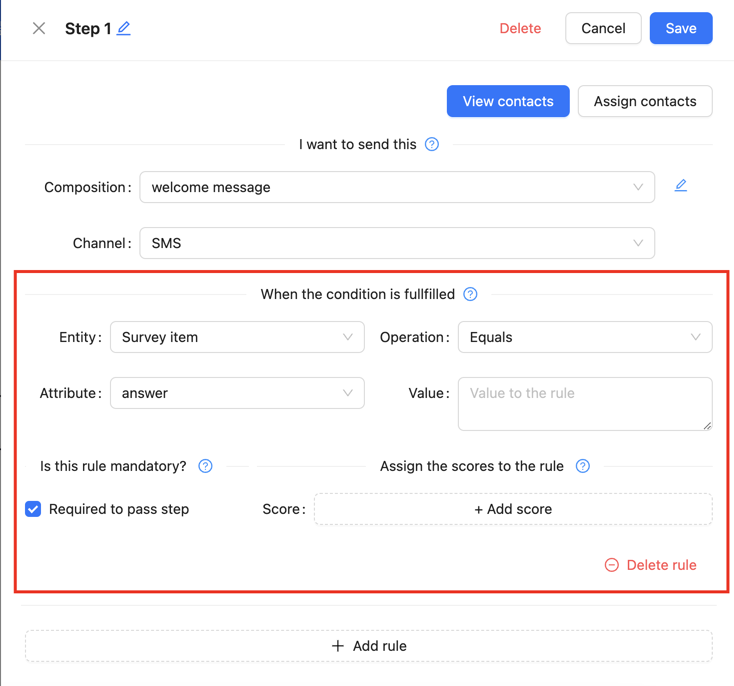
A journey rule serves as a condition for the step, ensuring that rather than sending the composition to all contacts, it is checked if the user meets the rule's criteria before dispatching it to them. Consider this scenario: in the initial step, you send a greeting message to all contacts, along with a link to a Typeform or VideoAsk survey. You aim to ensure that only those who complete the survey receive a follow-up message thanking them for their participation. In this scenario, the journey Rule functionality will assist us in achieving this specific workflow.
Let's describe each field functionality:
Entity: it is the entity where to find the response, at the moment we have 4 entities: DonationSubscription, DonationTransaction, Survey, and SurveyItem. This field will be as reference for the following fields. (Imagine this like a table of database)
Operation: this section presents a list of operations indicating what actions to perform with the obtained results.
Attribute: If we think of an Entity as a database table, then an Attribute is like the fields within that table. The attributes in the list will change if we modify the entity because attributes belongs to the entity.
Value: the value to compare
Required to pass step: this checkbox signifies that the rule is necessary for sending a composition. You have the option to disable this if you only wish to collect the action without preventing the step from sending.
Score: here you will define a multidimensional score for the rule. More details you fill find in the Score section.
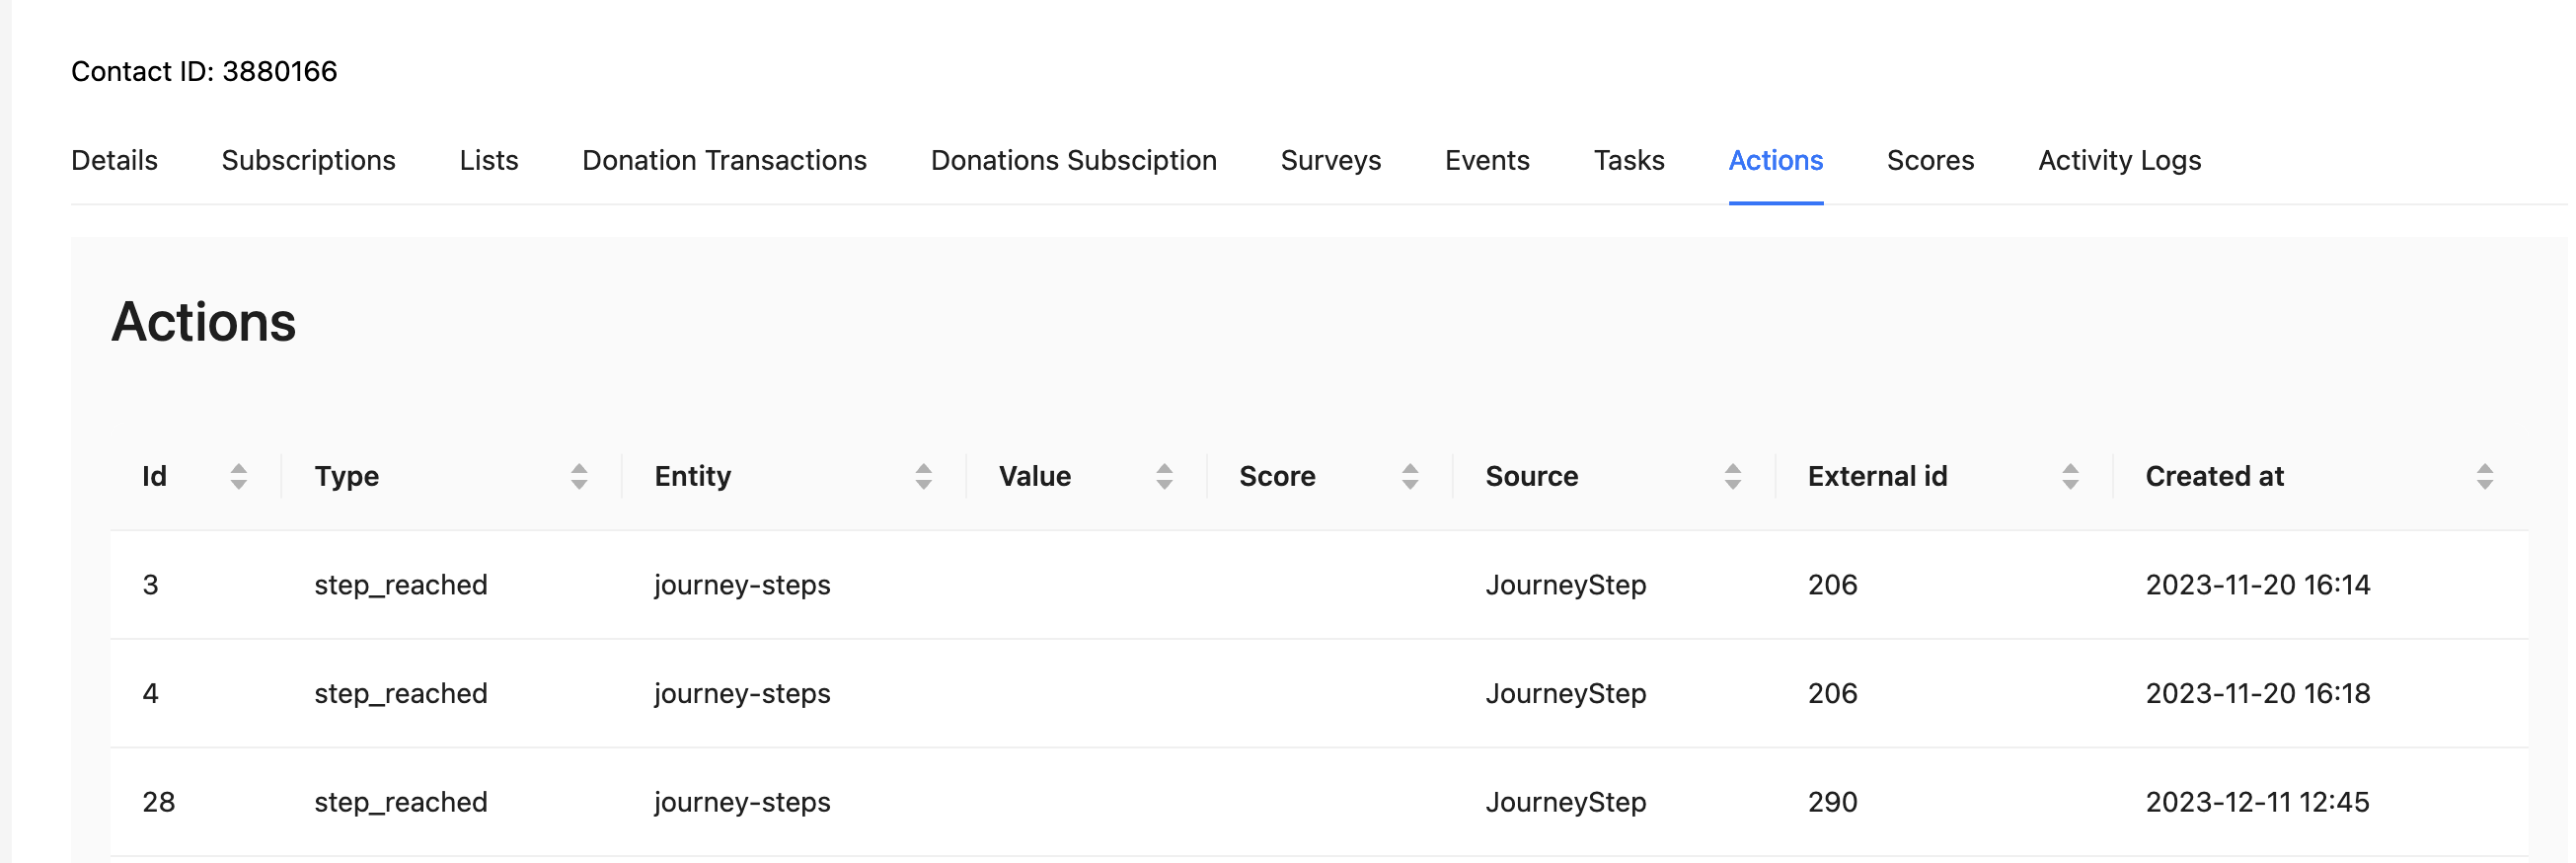
Actions
In the contact details, there's a section dedicated to our journeys, labelled Actions. Here, you can monitor user activities, including the steps they've reached. Through this dashboard, you can track the steps the user has already passed and the respective timestamps.
The Action dashboard:
Scores
The scores are primarily associated with journey steps, yet they can also be integrated into actions if the contact fulfills specific criteria. Let's explore the user interface for scoring and how to define them within journey rules:
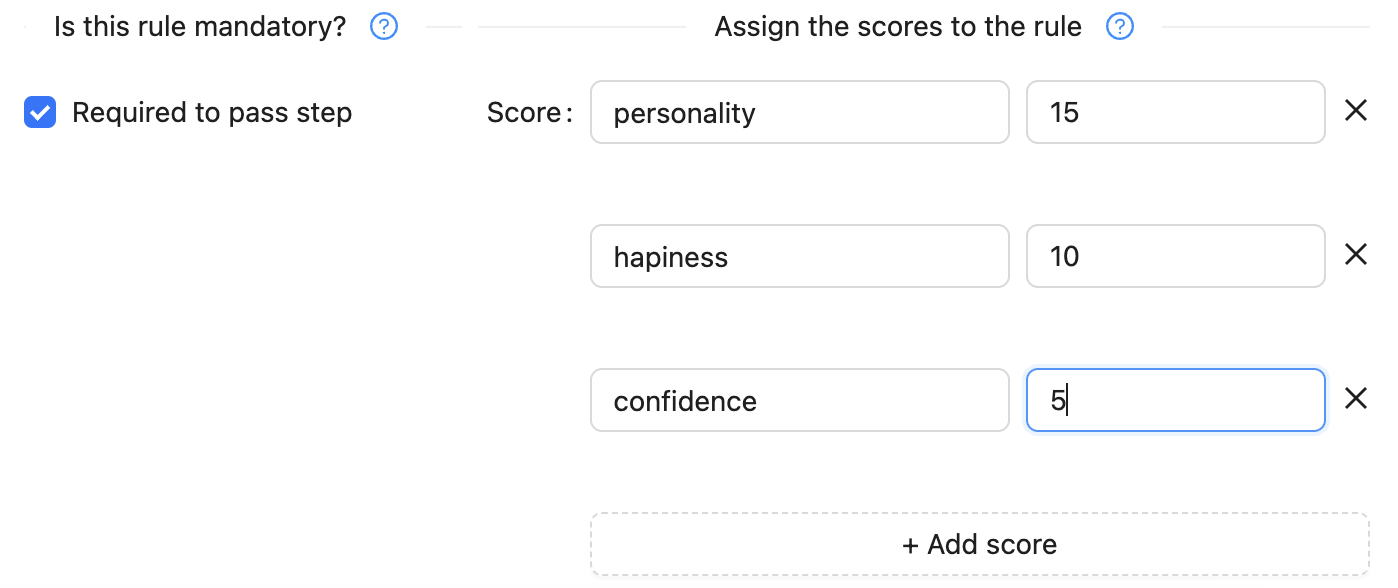
As seen in the image above, you can define a multidimensional score for the rule. These scores will be transferred to actions if the contact meets the criteria and will be available in the contact details.
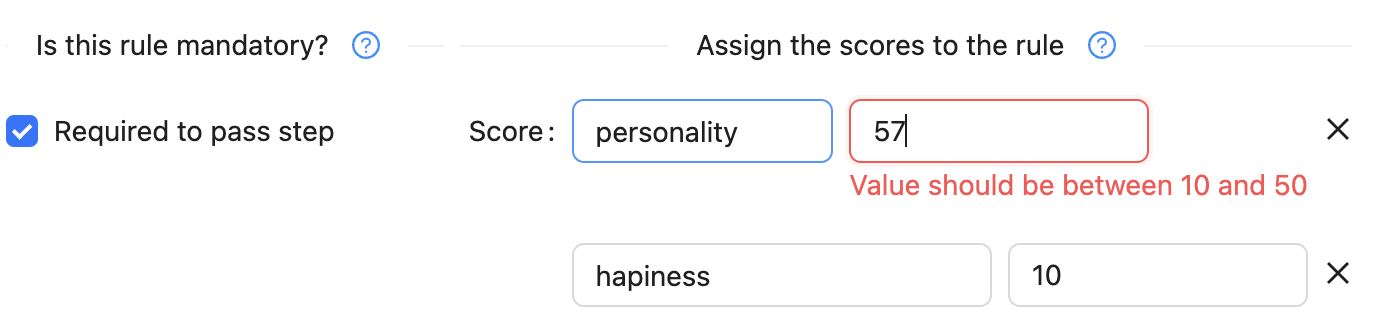
When building the scores, you also have the option to predefine them. This process occurs within a separate entity called ScoreRange in the Strapi Dashboard.
If we navigate to the Strapi Dashboard, we'll encounter the ScoreRange entity. Why is this useful?
Firstly, by defining these scores, they will appear in field suggestions, making your task a bit easier. Secondly, we can establish an interval with minimum and maximum values, compelling the journey builder to input a value between the specified minimum and maximum, as illustrated in the example below:
Score Dashboard
The Score Items also possess an independent dashboard within the contact details section, labelled Scores. Here, you can access all user score data, including additional functionalities such as counting and exporting.
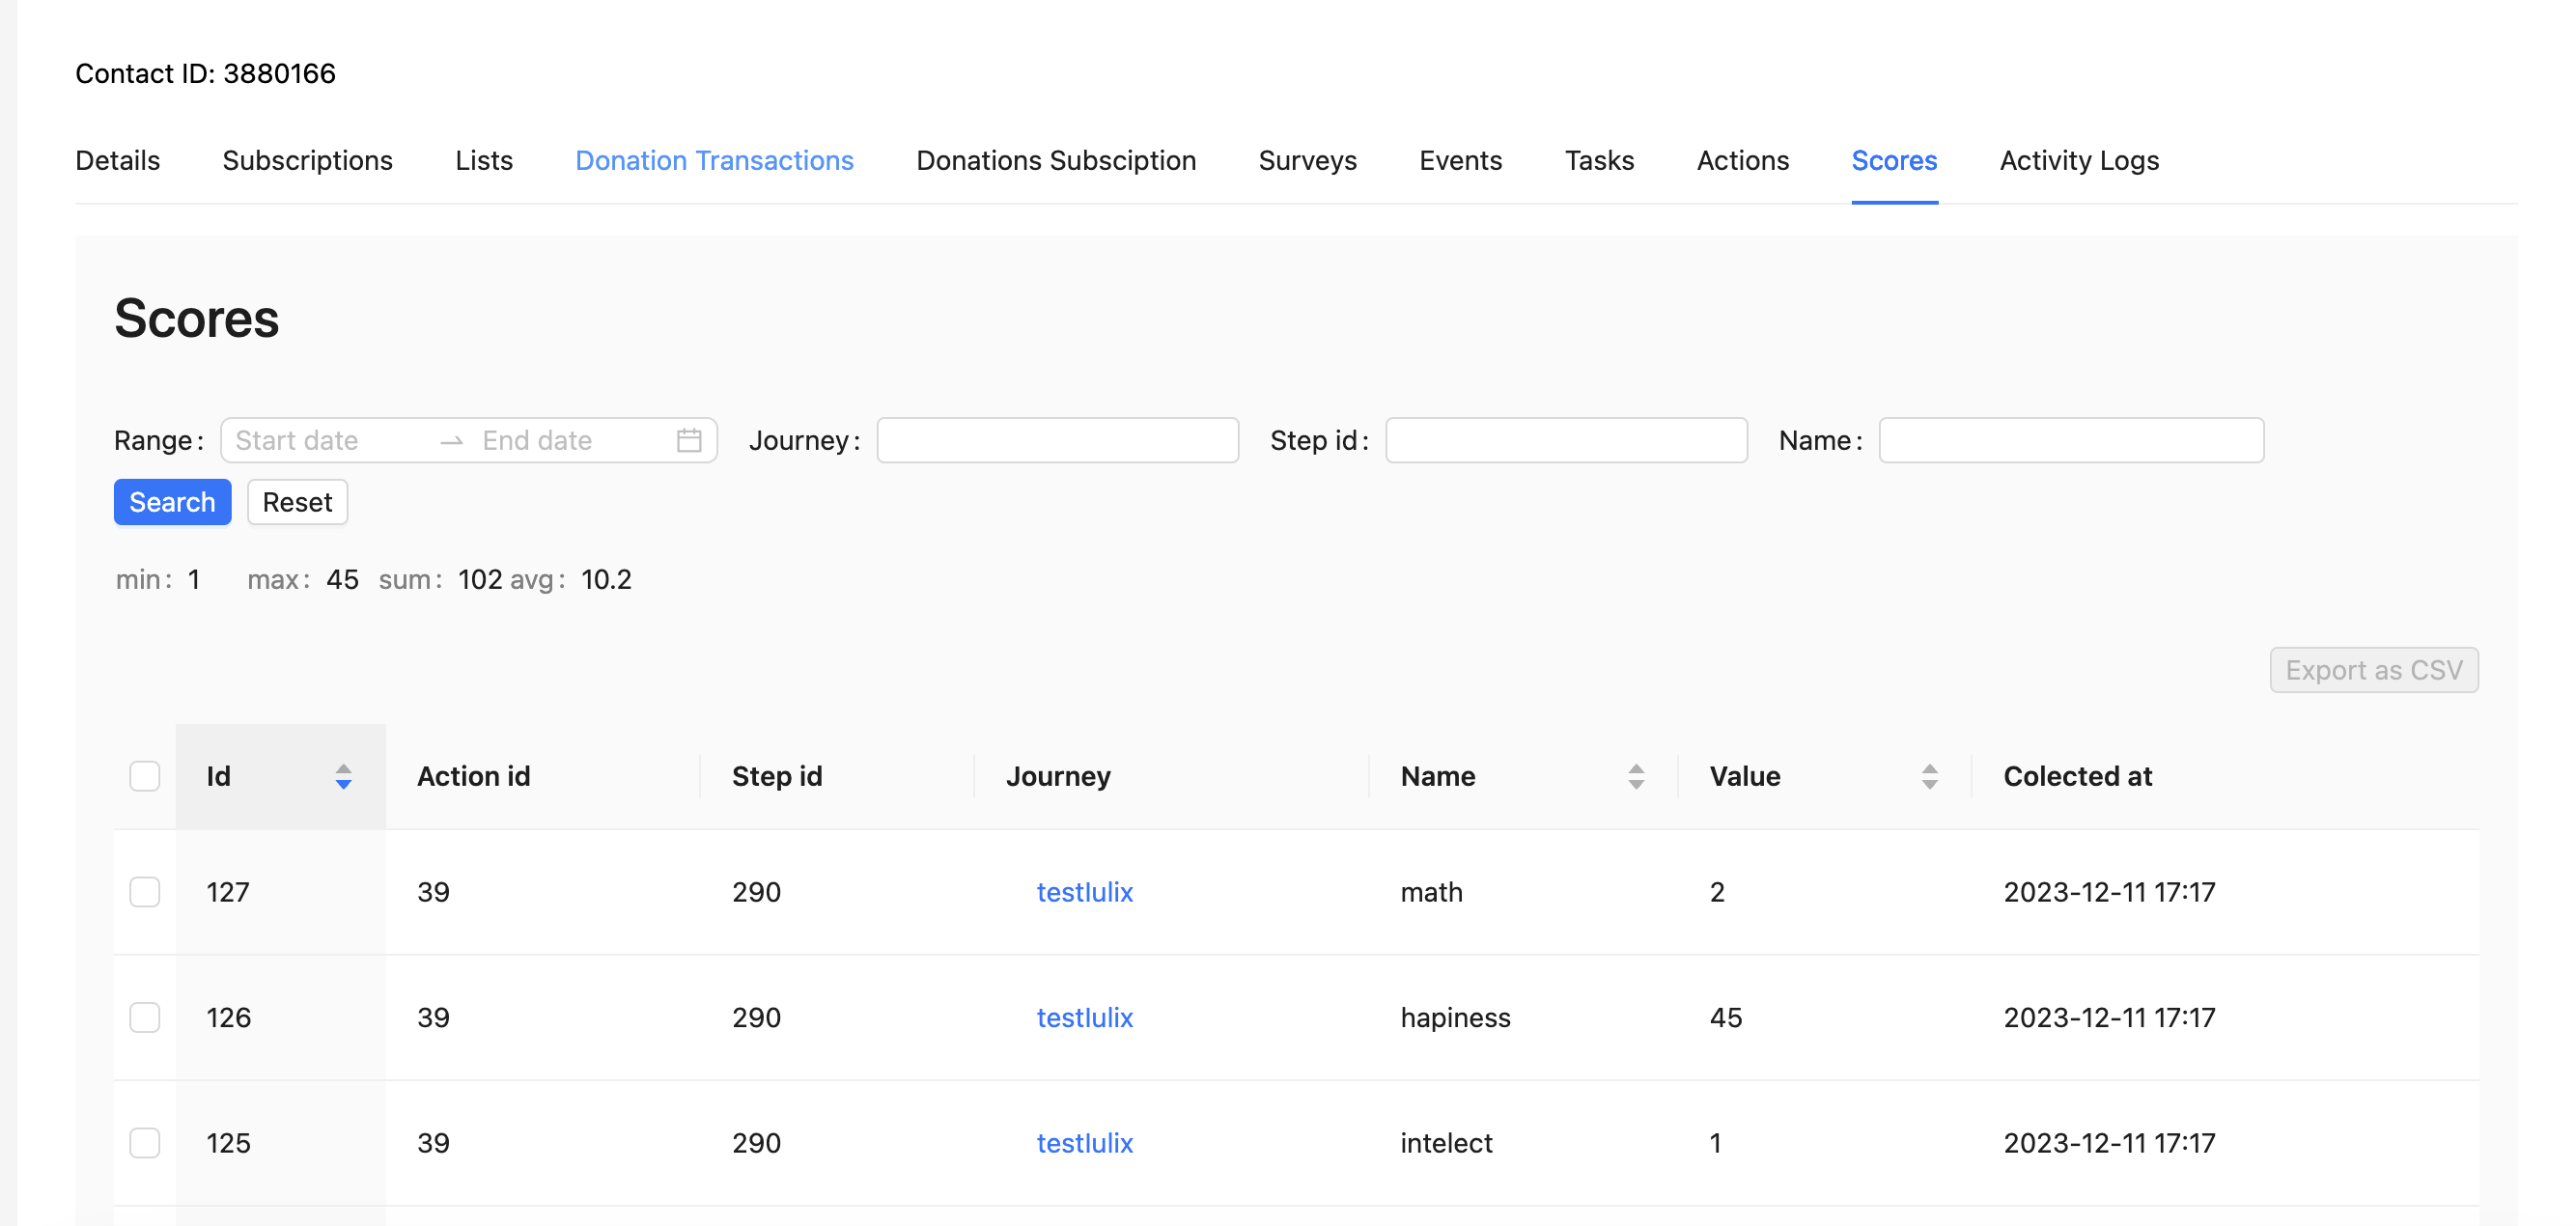
As observed, you can view scores within specific time intervals, automatically calculating minimum, maximum, sum, and average values.
Reusable Journey Steps
For a better performance, our CRM have the ability to predefine the journey steps if you don't want to build them each time from scratch.
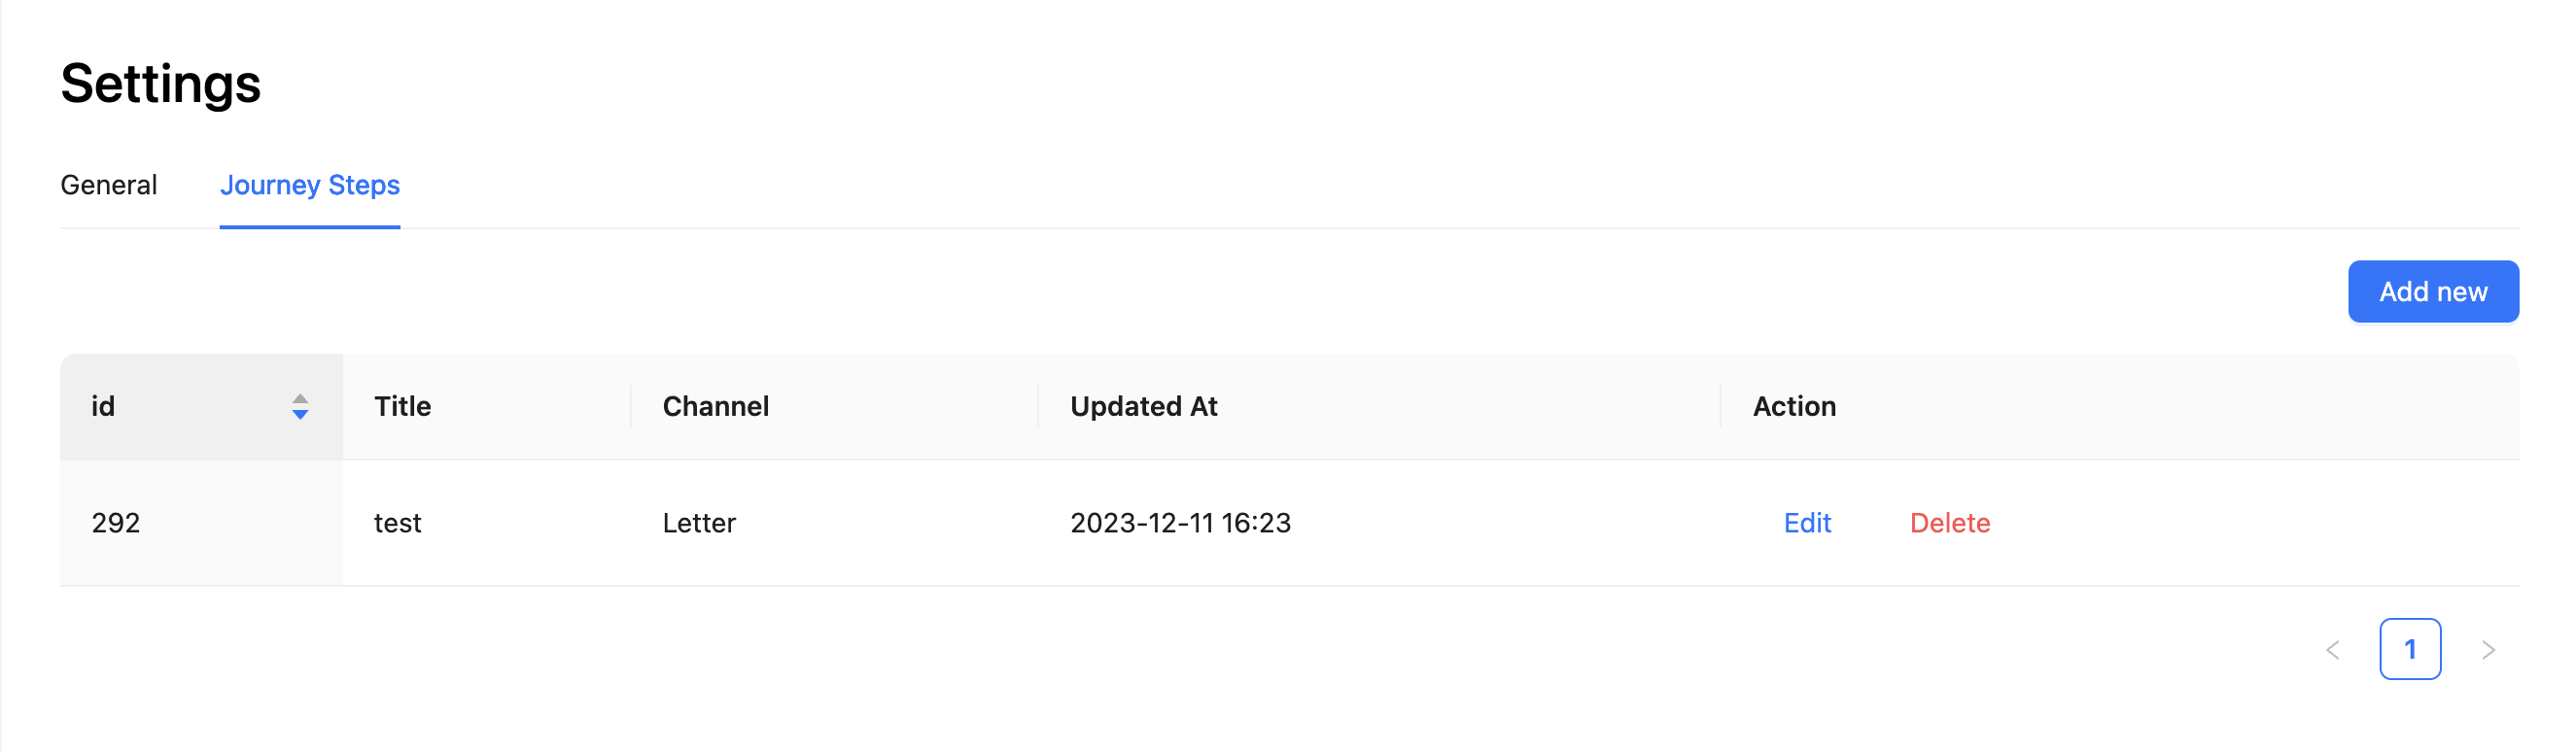
You can build them once and reuse them in each journey. To do that, just go to the setting:
Admin > Settings > Journey Steps and there build the steps as usually:
Once you created some steps import them using create step button:
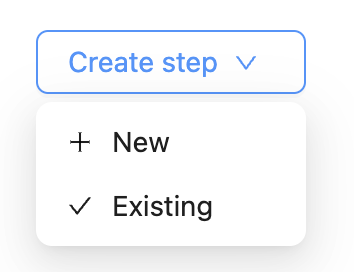
And there you will see the global step list:
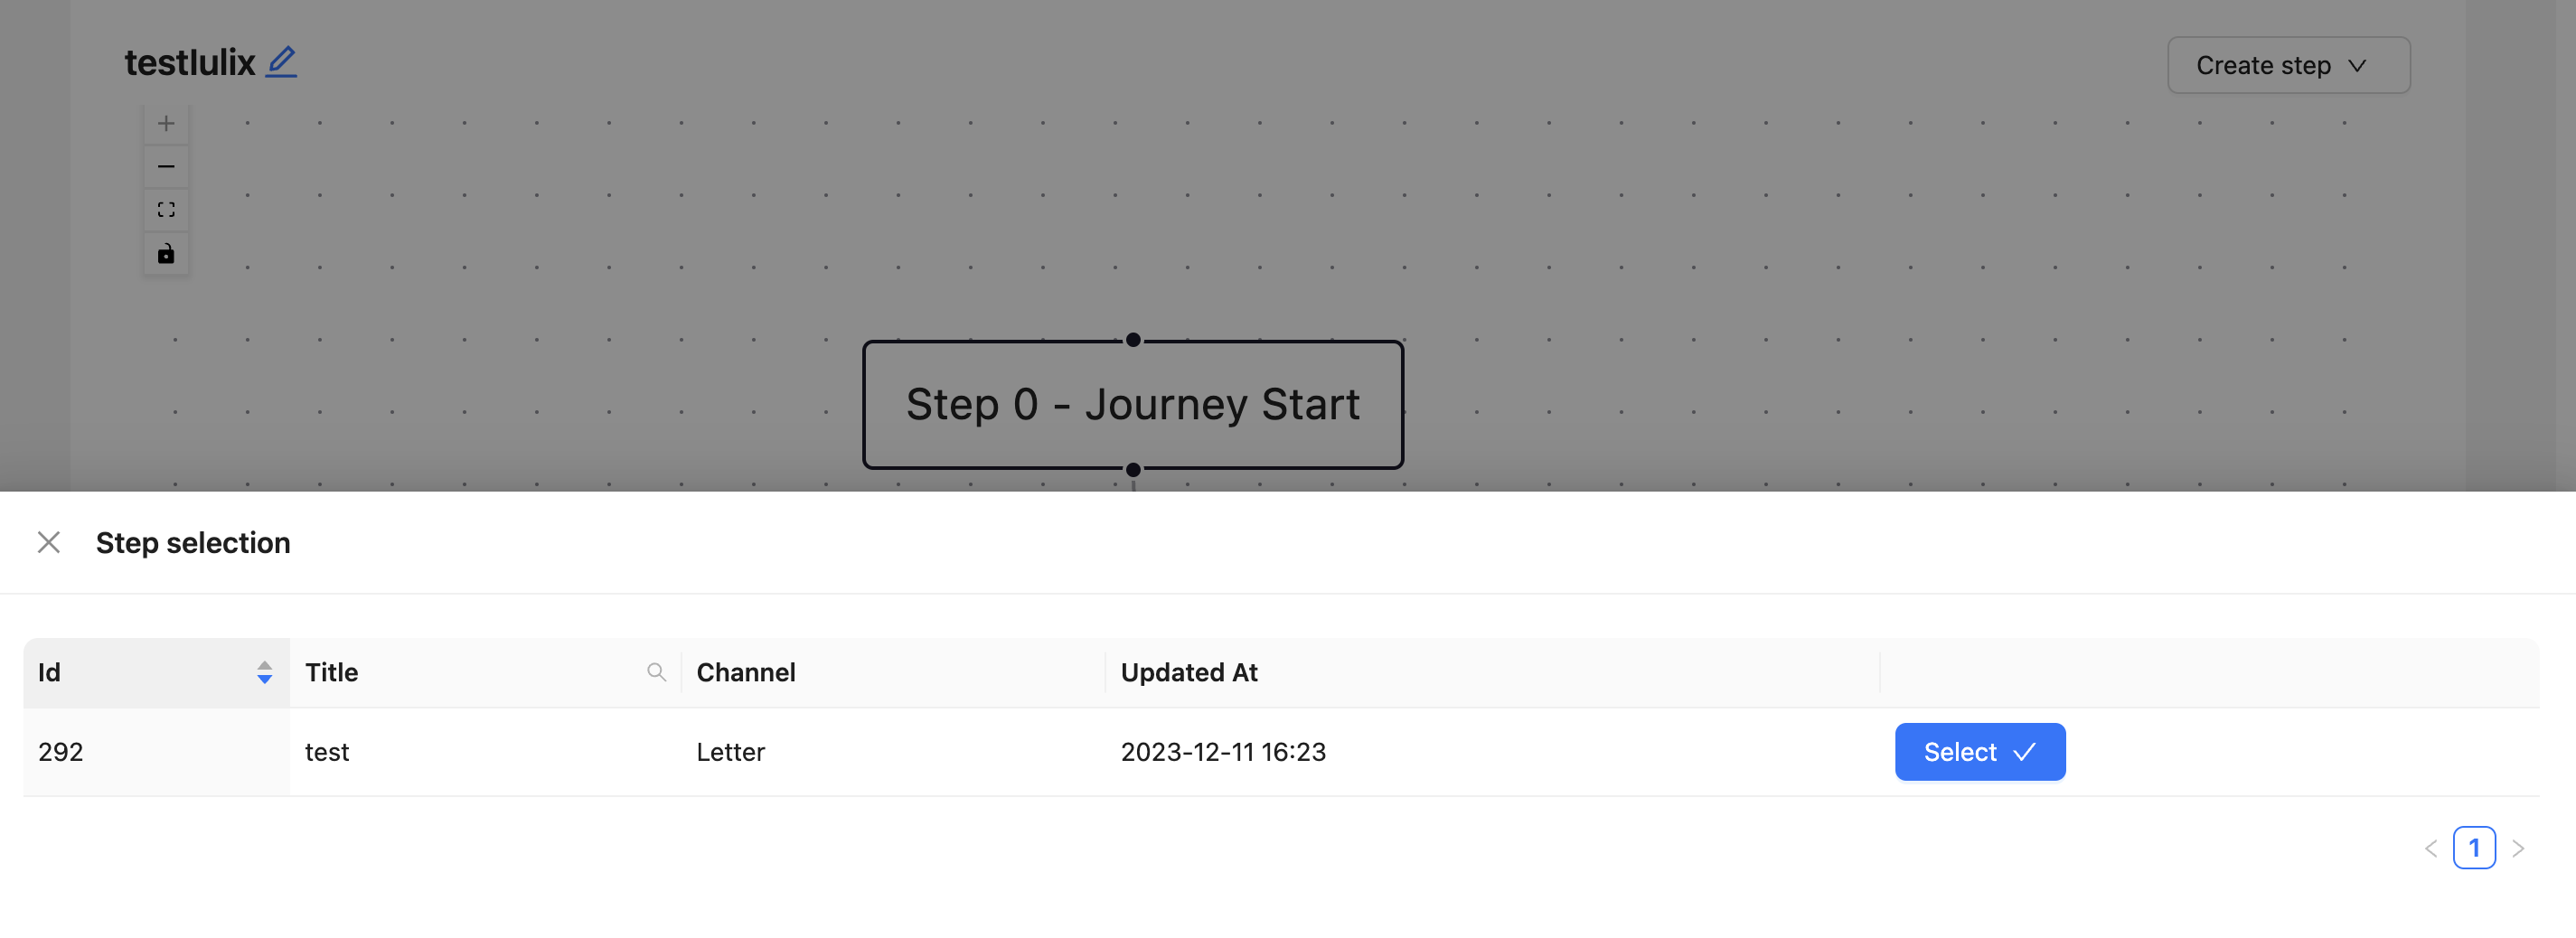
just select one of them and it will be automatically added as last node.